
Homemade Caramel Sauce
Tuesday, December 13, 2016

Making homemade caramel sauce may seem like a daunting task, but with just a few stock pantry items and about 15 minutes, you can create a delicious and rich sauce that is great on ice cream, pastries, cheesecake, brownies, cookies, cake, apples...I think you get the idea!
Homemade Caramel Sauce

Homemade Caramel Sauce
{yield: 1 ⅓ to 1 ½ cups}
1 cup sugar
¼ tsp. Kosher salt
2 tbsp. cold water
6 tbsp. unsalted butter, melted
½ cup heaving whipping cream
2 tsp. vanilla extract or ¼ tsp. butter-rum or butterscotch flavor
To make the caramel sauce, start by adding the sugar, salt and water into a deep, heavy bottom saucepan. I used a 2-quart saucepan as the mixture will bubble up during the process. Stir to combine over medium-high heat until the syrup starts to bubble.
As the mixture comes to a boil, reduce the heat to medium and watch it carefully! No one likes a burnt caramel. The syrup will begin to turn a golden color around the edges. Swirl the pot around to keep the syrup moving and to prevent the edges from burning before the center changes color. Stirring the syrup occasionally towards the center of the pot will help with this.
After a couple of minutes, the syrup will begin to get darker in color. As soon as it reaches a rich amber color, remove it from the heat and stir in the melted butter. Once the butter has been mixed in, stir in the heavy whipping cream. If the sauce starts to get lumpy, don't worry...just keep stirring until the mixture smooths out. Lastly, add the vanilla extract or other flavoring of your choice.
Once the sauce is completely smooth, allow it to cool slightly in the pan before pouring into a glass or ceramic container. I find mason jars are perfect for this and easy to store. Once the caramel has cooled to room temperature, store in the refrigerator until ready to use. Enjoy!
Recipe from King Arthur Flour.
Hot Cocoa Cookies
Wednesday, December 7, 2016

When I was going to college in New Hampshire, a hot chocolate was always the perfect treat on a cold...well actually, a freezing winter night. There is nothing like the combo of creamy rich chocolate and soft gooey marshmallows to warm you up, am I right!?
Hot cocoa is a perfect holiday drink and it also makes a perfect holiday cookie. It is total perfection and what's happening on the blog today!


Hot cocoa is a perfect holiday drink and it also makes a perfect holiday cookie. It is total perfection and what's happening on the blog today!
Hot Cocoa Cookies
{yield: 34 cookies}
8 oz. semi-sweet chocolate, divided
¾ cup unsalted butter
1 ¼ cup sugar
2 eggs
1 ¾ cup flour
½ tsp. baking powder
17 large marshmallows, cut in half
3 tbsp. milk
Start by measuring out 6 oz. of semi-sweet chocolate chips in a medium microwave-safe bowl. Add the unsalted butter and microwave on high for 1 minute or until the butter has melted. Stir the mixture until the chocolate is completely melted and combined with the butter.
Add the sugar and mix in one egg at a time. Then add the flour and baking powder and mix together. Please note the dough will be very soft so it is super important to refrigerate for at least two hours before baking.
Preheat your oven to 350 and remove the cookie dough from the fridge. Using a cookie scoop, scoop and roll the dough into balls and place on greased baking sheet (I used coconut cooking spray) allowing about 2 inches of space in between.
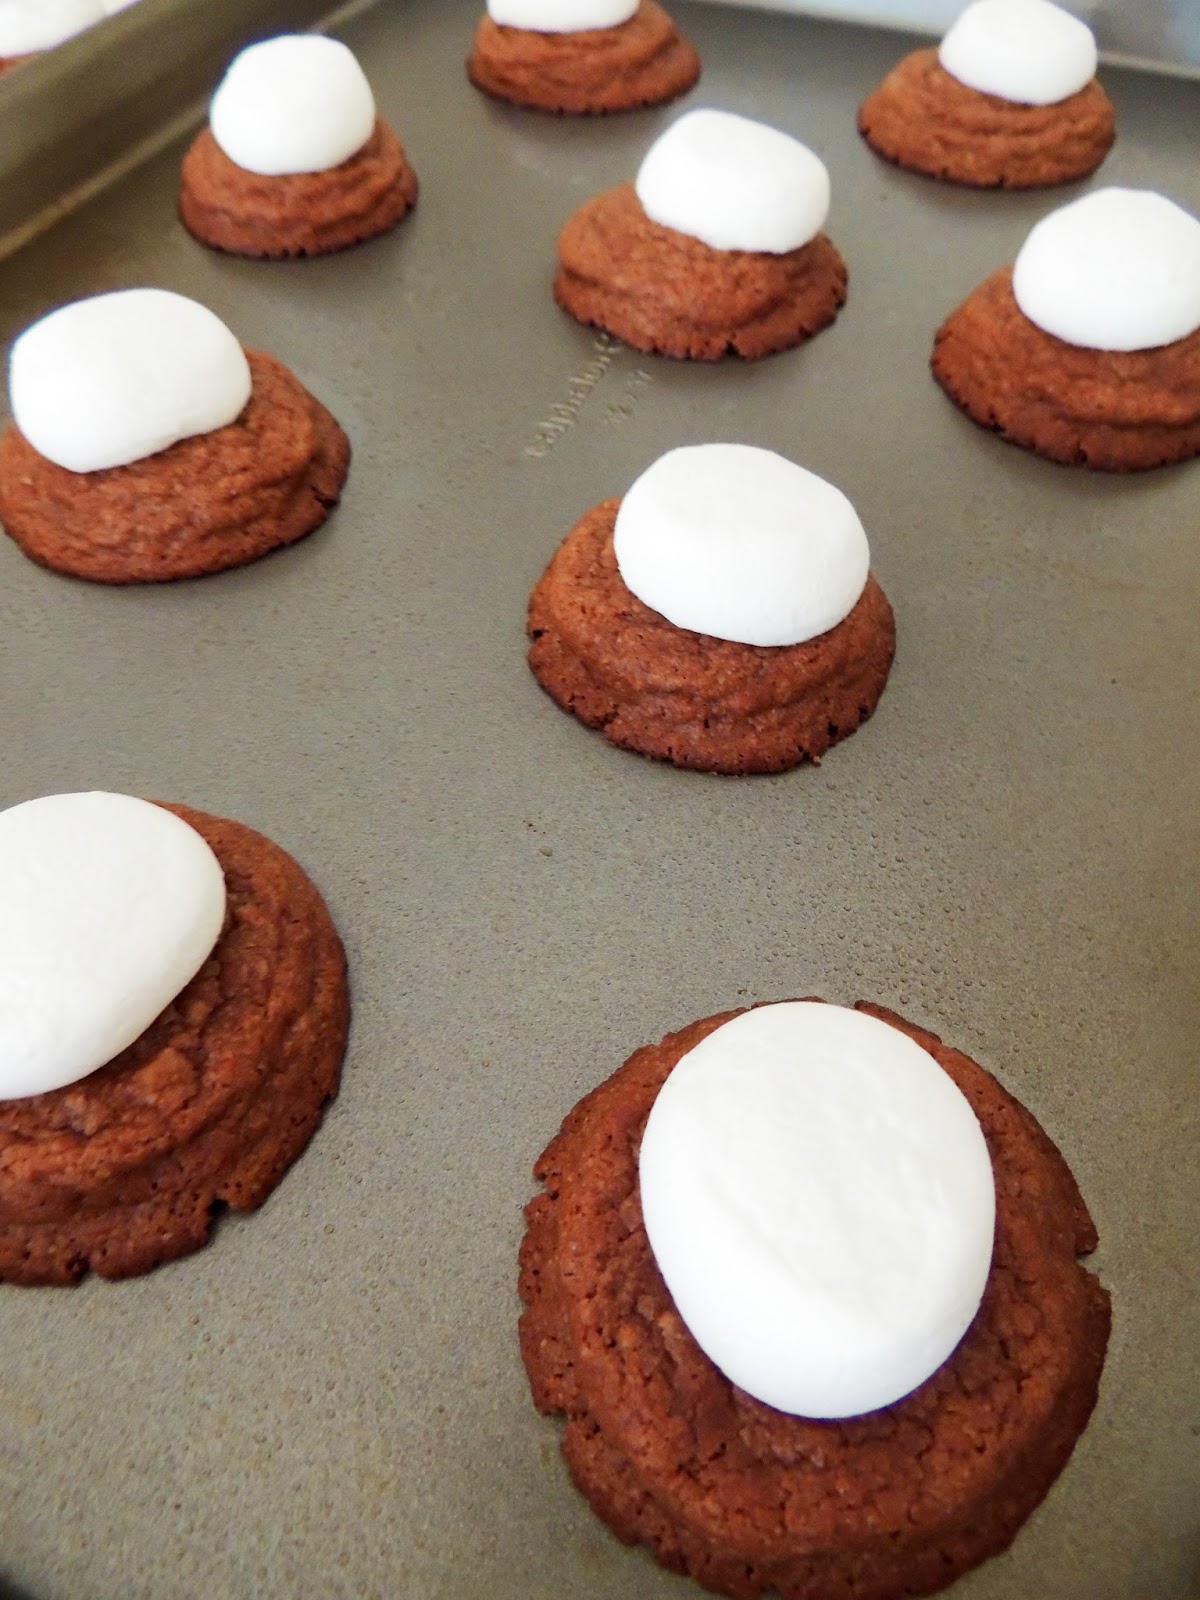
Bake for 8 to 9 minutes or until the dough is no longer shiny on top. The cookies will still be soft, but that is exactly what we want! Immediately top each cookie with half a marshmallow with the cut side down. Place back into the oven and bake for 1 to 2 more minutes. The marshmallows will puff up, but no "toasting" will occur. If you would like to toast them, just use a small kitchen torch to toast the tops of the mallows!
Allow the cookies to cool on the baking sheet for about 5 minutes before moving them to a wire rack to cool completely.
While the cookies cool, heat the remaining semi-sweet chocolate chips in a microwave safe bowl in 30 second increments in the microwave. Once melted, add the milk and stir until combined.
Then drizzle the melted chocolate over the tops of the marshmallows...YUM! I used a squeeze bottle for this process, but you could also use a pastry or zip lock bag.
Refrigerate the cookies for 10 to 15 minutes to allow the chocolate drizzle to set. Once set, remove from the fridge and start enjoying!
Winter equals cookie season in my book and these are the bomb dot com! I also heard that Santa LOVES these cookies and would appreciate some left out on Christmas Eve with a tall glass of milk! :)
Recipe from Kraft.
Gingerbread Cookie Truffles
Monday, December 5, 2016

Gingerbread holds a special place in my heart. Every year growing up my mom and I would bake and decorate gingerbread houses and cookies in December. It was something I always looked forward to making and turned gingerbread cookies into one of my favorites.
I was in Target the other day picking up a few things (aka everything that wasn't on my list) and came across a box of Pepperidge Farm Ginger Family Cookies while I was in the holiday section. They sparked my interested and I thought they would make a perfect no-bake cookie truffle...and boy was I right!

In a food processor, grind the cookies until they are finely crushed. Then in a mixing bowl, combine the ground gingerbread cookies (reserve about 1 tablespoon of crumbs for later) and softened cream cheese.


Gingerbread Cookie Truffles
{yield: 30 servings}
6 oz. of reduced fat cream cheese, softened
36 Pepperidge Farm Ginger Family cookies, finely crushed and divided
10 oz. of semi-sweet chocolate, melted
In a food processor, grind the cookies until they are finely crushed. Then in a mixing bowl, combine the ground gingerbread cookies (reserve about 1 tablespoon of crumbs for later) and softened cream cheese.
Using a small 1 inch cookie scoop, scoop the mixture into 30 balls and place on a parchment lined cookie sheet. Once all balls have been formed, place the sheet into the freezer for 10 to 15 minutes.
During this time, add the semi-sweet chocolate chips into a microwave safe bowl and heat in 30 second increments until melted. Make sure you stir the chocolate after every 30 seconds to insure that it doesn't burn!
Remove the gingerbread balls from the freezer and dip into the melted chocolate. Place back onto the parchment paper lined cookie sheet and sprinkle the top of each cookie truffle ball with the reserved cookie crumbs.
Refrigerate for an hour or until the chocolate has set before serving. Keep the gingerbread truffles refrigerated in an airtight container if you plan to serve them at a later point.

These no-bake cookie truffles would be perfect for any holiday party or cookie swap. Enjoy!
These no-bake cookie truffles would be perfect for any holiday party or cookie swap. Enjoy!
Subscribe to:
Posts (Atom)


Social Icons